How to Build a Custom Watch
June 9, 2023
Intro
If you like tinkering and you like watches, you would probably like building one. It’s not something most people would think of doing; it’s just one of those things you assume you can’t make, but with a little bit of research and a few tools you can. I recommend sourcing your parts on eBay, but there are plenty of good sites for parts; for example, I bought my dial from NamokiMods.
Part Selection
The first thing you need to do is pick a movement— this will be the heart of the watch and will determine most of its features and a large part of the cost. I chose the NH35 Automatic Movement. Next, you can look for either a dial or a case. I would recommend looking for a dial first as it must fit your specific movement; some might need slight modification, like snipping a peg on the bottom off, so if it’s not fitting, this might be your problem. Once you’ve picked a dial, you need to pick a case or hands. I recommend a case first. You can buy a case that comes with or without a strap or bracelet and there are two things you need to check when searching for a case: First, check if the case fits your movement, then check if it fits your dial. Just because your movement fits your dial and case, it doesn’t necessarily mean the dial will fit the case. Cases fit certain size dials; sometimes there will be a range such as 31.5mm-33mm. In this case your dial must fall in that range. When buying hands you need to make sure they fit your movement. Finally, when buying a strap or bracelet you need to make sure it has the proper lug width. If you are buying a strap or bracelet that is meant to sit flush with the case, you need to make sure they are compatible. Straps/bracelets can be swapped out easily.
Tools/Equipment
You will need a few thing to assemble your watch: silicon/rubber gloves, case back opener, hand pushers, small clippers able to cut through metal, watch tweezers, and an air duster. You may need small screwdrivers and a link remover as well. Other items that are useful but not absolutely necessary: a movement holder, watch holder, and Rodico putty.
Installing Dial
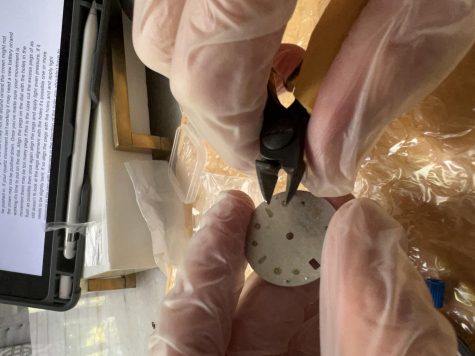

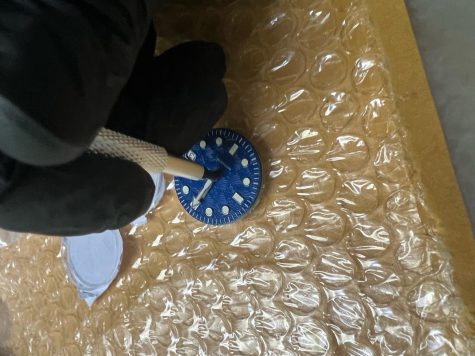
First, look at your movement. For mechanical movements, make sure the balance wheel is spinning. If it’s not, it may not be wound and/or the crown might not be pushed in. If your quartz movement isn’t working, it may need a new battery and/or the crown may not be pushed down. Once you’ve made sure your movement is working, it’s time to put on the dial. Align the pegs on the dial with the holes in the movement. There may be too many pegs– if this is the case, cut the excess pegs of as flush as possible then once again align the pegs and apply light even pressure, if it still doesn’t fit look at the pegs alignment with the holes it’s possible one or more needs to be slightly bent, if so align the pegs with the holes and and apply light pressure to the peg with tweezers in the direction of the hole you shouldn’t have to put much pressure, you may need to unscrew the screws that hold in the dial on the movement depending on the movement, once the dial is in place tighten the screw to hold the dial in place, not all movements have screws to hold the dial some just have holes.
Installing Hands

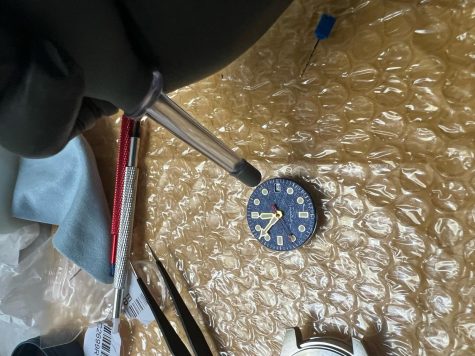
Next pull the crown, if you have a day and or date function, turn the crown until the day/date turns and no more the bare minimum to make the day/date turn. Now it’s time to put the hands on, the hour hand is first make sure it’s perfectly lined up at 12 a clock before you push downwards using your pusher next repeat the process with the minute hand, the second hand might be a little different, in that it might have a little peg protruding from the bottom with a hole in it, in this case the pusher you use must be flat, if the set you bought didn’t come with one then you can use the back of a marker or something similar. Once all the hands have been attached spin them around and make sure they are lined up perfectly, also make sure they are not touching each other or anything on the dial, do this by looking and by hearing, if something is touching very gently bend it until it no longer touches, make absolutely sure, you don’t want to have to disassemble it later.
Installing Case
Now, the stem must be removed. There will be either a screw that must be unscrewed on the back or something you need to push down on. Do not lay the dial face down at any point! This part may be difficult and you must be careful. It may be hard to find, but you can look up where the stem release is for your specific movement. Once you’ve got the stem out, make sure the dial is completely perfectly clean and free of dust. You can remove any dust or debris with Rodico putty and an air duster, now make sure there is absolutely no smudges or dust on the crystal. If there is, you can remove smudges with a microfiber cloth and dust with an air blower. Once both the dial and crystal are perfectly clean and free of dusk, carefully put the movement in the case and look at it under different light to make sure there is absolutely no dust or smudges.
Trimming Stem/Installing Crown and Stem
Next, screw the crown on the stem, put the stem with the crown in the movement, make sure it’s all the way in and spinning the hands and mark the stem to be cut. It’s much better to cut too little than too much. Now take the stem out unscrew the crown and cut it as flat as possible, then gently sand the end in a circular motion, you don’t need to do this much just a little, screw the crown back on the stem and put it in the movement, if you have a screw down crown make sure it’s working, If it doesn’t fit, keep cutting and sanding until it does, when it fits take it out, unscrew the crown and put a small amount of Loctite on the end if you have it, screw the crown back on the stem and using the inner part of the tweezers grip the square parts of the stem and twist the crown making sure it’s tight on the stem. Insert it into the movement.
Securing Movement/ Installing Case Back
Make sure the movement is secure in the case you may need to push it in place or screw it down, once you’ve done that give it a dust with the air duster then put the gasket in place it may require a bit of fiddling around, If you have a seeing case back make sure it is free of smudges, then put the case back on.
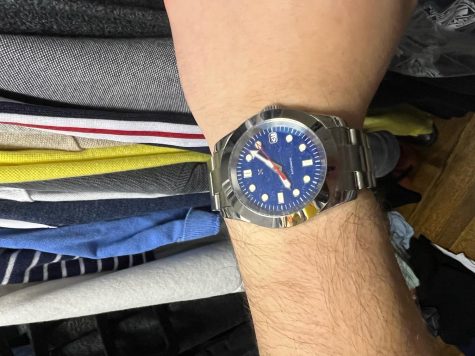
Now you just need to add your strap and your finished, wear it with pride you built it!!