I think one of the best ways to pass time is by drawing. And while you don’t have to pursue an art career to want to draw, it’s nice to know how to do any sort of drawing to let out personal thoughts.
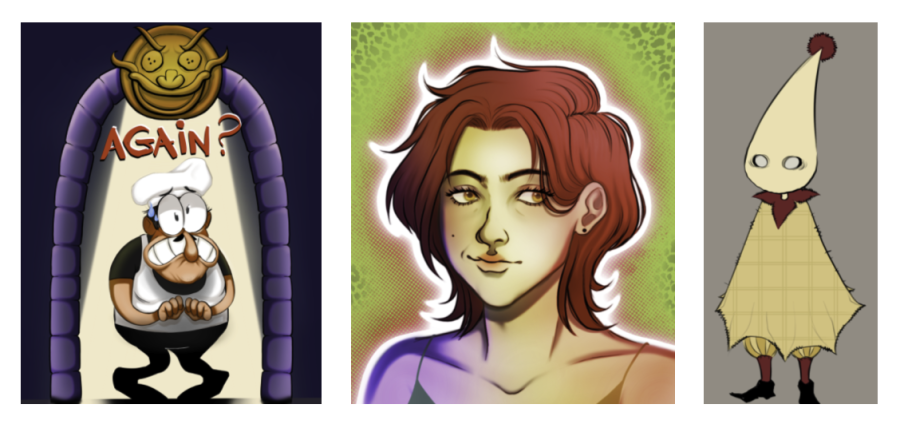
This tutorial will be about busts, which is a term describing any art that depicts the head and shoulders. Note that while a specific style is being used here, any style ranging from realistic to heavily stylized can be applied. Another tendency that beginners usually have is directly imitating a tutorial, but these are meant to be used as guidelines, not a “get-better-fast” strategy.
- Draw a circle. While it may sound demanding if you’re trying to get it perfect, the point of the circle is to help you get a better head shape, not to be nice and round. It doesn’t matter if it’s perfectly closed or not, just make sure it’s what you’re looking for in a forehead.

- Start shaping your head. I’m deviating into two different busts. One is of a child and is much rounder. The other is of an adult male and his head is more rigid, with the chin more defined.

- Draw cross-hatches on your face. This is important if you want to get your facial structures in the right places. Generally, the rule is that your eyes should be one eye apart. You can draw a “third eye” in the middle if you want to visualize this better. For realistic faces, the eyes are also one eye length from the edge of the face. Depending on the style, you can break this rule.

- Draw your eyes and nose! Thanks to your guidelines, your nose should be below the eyes right on your center line. Childlike eyes are more round and the irises are larger, while mature eyes have more lines and are less circular. Also, it helps if you draw out the edges of your mouth first so you know what kind of shape it’s going to be.

- Draw your mouth. In most cases it should be generally symmetrical with your center line.

- Start your hair and eyebrows. The easiest way to draw hair is with bangs, such as on the left. More challenging is determining hair lines if it’s slicked or tied back, but note there are many other ways! The important thing is to start with what you’re most comfortable with and slowly branch out to more varieties. Most of the time thicker eyebrows indicate rougher personality, and in strained expressions the muscle lines are visible.

- Draw your ears and start the shoulders. Adjust your head shape with darker lines. Based on the guidelines, the horizontal one should cut directly through the middle of the ears. Simple ears only need a few lines, while more advanced ears are more layered. A good idea would be to practice by tracing a picture. Also, relaxed shoulders show off the trapezius muscle, which looks like a triangle sloping from the neck. These are bigger in muscular people. By this point you should have moved on from your face guidelines and you can now draw a more determined line for your head shape.

- Develop the top of the torso. In adults, the shoulders are about 3 heads put side to side. Meanwhile the actual shoulders should branch more horizontally than your trapezius. You can now start clothing if you wish, but at this point your basics are done!

Drawing takes a lot of practice to master, but like skiing, it’s easy to learn. I hope this helps people who say they can’t draw or can only draw stick figures. In fact stick figures are great guidelines when it comes to posing, but that’s reserved for another day.